

Introduction to Windows Installation
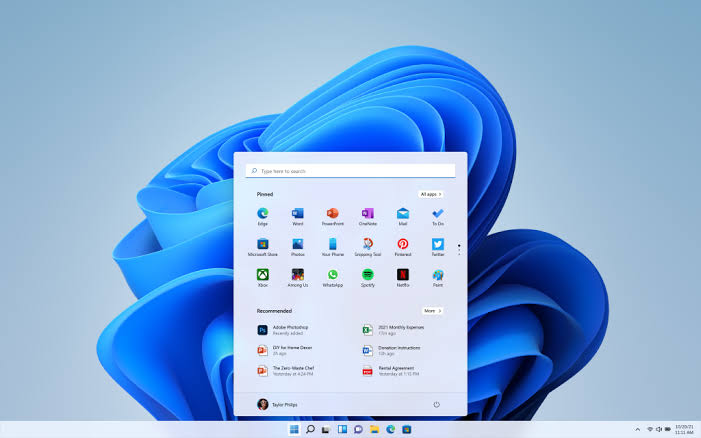
Windows 11 is no longer just a visual upgrade; it is a complete shift in how Microsoft designs and secures its operating system. With a centered Start Menu, tighter security layers, and deeper integration with cloud services, it feels modern compared to Windows 10. But here’s the catch—many users rush into installation without understanding the requirements, and that’s where problems begin.
A lot of people think installing Windows 11 is just clicking “Next” a few times. In reality, it involves hardware checks, firmware settings, and compatibility layers that can block installation instantly. If you ignore these steps, you may face errors like “This PC can’t run Windows 11” or installation loops that waste hours. That’s why understanding the process first saves you from frustration later.
Latest Windows 11 System Requirements (2026)
Hardware requirements explained
Before installing Windows 11, your PC must meet specific requirements. According to current system standards, you need at least a 1 GHz dual-core 64-bit processor, 4GB RAM, and 64GB storage space. Your device also needs a DirectX 12 compatible GPU and a 720p display or higher. These are the baseline conditions for smooth operation.
However, meeting minimum specs does not always guarantee compatibility. Many modern features depend heavily on hardware acceleration, SSD storage, and updated firmware. That means even older “technically compatible” systems may still feel slow after installation.
TPM 2.0 and Secure Boot importance
The biggest barrier for most users is TPM 2.0 and Secure Boot. These are security technologies that protect your system from unauthorized firmware attacks and malware during startup. Microsoft made them mandatory for Windows 11 to ensure stronger protection.
Without TPM 2.0 enabled, installation will often fail instantly. Similarly, Secure Boot ensures only trusted software runs during startup. If either is missing or disabled in BIOS, Windows 11 setup may refuse to proceed.
Pre-Installation Checklist
Backing up your data
Before touching anything, backup your files. This step is not optional. A Windows installation can sometimes erase partitions or corrupt existing data if something goes wrong. Use external drives or cloud storage like OneDrive or Google Drive to secure important documents, photos, and software licenses.
Think of it like renovating a house—you wouldn’t start breaking walls without moving your furniture first. Your data deserves the same protection.
Checking system compatibility
You should always verify compatibility before installation. Microsoft’s PC Health Check tool can quickly tell you whether your device supports Windows 11. If your system fails the check, you may need BIOS updates or hardware upgrades before proceeding.
Skipping this step often leads to installation failure halfway through the process, which is one of the most frustrating experiences for users.
Methods to Install Windows 11
Upgrade via Windows Update
The simplest method is upgrading directly through Windows Update. If your PC is eligible, Windows 11 will appear automatically in the update section. This method keeps your files intact and requires minimal effort.
However, not all systems receive the update at the same time due to Microsoft’s staged rollout. Sometimes, you may have to wait weeks before it appears.
Clean installation using USB
A clean installation is the most powerful method for performance improvement. It removes old files, viruses, and system clutter. According to installation guides, creating a bootable USB drive is the most reliable approach for this process .
This method is preferred for new SSD setups or heavily corrupted systems, but it requires careful setup of BIOS and partitions.
Step-by-Step USB Installation Process
Creating bootable USB
To begin, you need an 8GB or larger USB drive. Use tools like Microsoft Media Creation Tool or Rufus to create a bootable installer. Once the ISO file is loaded, the tool prepares your USB with Windows installation files.
Make sure you select GPT partition style and UEFI mode for modern systems. This ensures faster boot times and proper compatibility.
BIOS/UEFI configuration
Restart your PC and enter BIOS using keys like F2, DEL, or F12. From here, enable UEFI mode and Secure Boot if available. You may also need to prioritize USB boot in the boot order settings.
This step is crucial because incorrect BIOS settings are one of the main reasons installation fails.
Installing Windows 11
Once your PC boots from USB, follow the on-screen instructions. Choose language, region, and edition. Select “Custom Install” if you want a fresh setup. Then choose the drive where Windows will be installed.
The installation process usually takes 10–45 minutes depending on SSD or HDD speed. After reboot, complete the setup process including Microsoft account login and privacy settings.
Common Installation Errors and Fixes
TPM and Secure Boot errors
One of the most common issues is TPM 2.0 not detected or Secure Boot disabled. These errors completely block installation. You can resolve them by entering BIOS and enabling both features if your hardware supports them.
If your system does not support TPM, some users attempt workaround methods using modified installation media, but these can reduce system stability and future update support .
Installation failure solutions
Other errors like corrupted ISO files, bad USB drives, or interrupted setups can also stop installation. Always re-download ISO files from official sources and use high-quality USB drives.
Disconnecting unnecessary peripherals during installation also helps avoid conflicts and random errors.
Performance Optimization After Installation
Driver updates
After installation, the first thing you should do is update all drivers. This includes graphics, chipset, and network drivers. Without proper drivers, Windows 11 may feel slow or unstable.
Visit your device manufacturer’s website for the latest drivers instead of relying only on Windows Update.
System tuning tips
Disable unnecessary startup apps to improve boot time. Adjust visual effects for better performance if you are using low-end hardware. Also, regularly run Windows Update to keep your system secure and optimized.
These small changes can significantly improve your overall experience.
Should You Upgrade or Wait?
This depends on your hardware and usage needs. If you have a modern PC with SSD storage and TPM 2.0 support, upgrading to Windows 11 is a good decision. You will get better security, improved UI, and long-term support.
However, if your system is older or struggling with performance, waiting or upgrading hardware first is smarter. Installing Windows 11 on unsupported hardware can lead to instability and update issues over time.
Think of it like upgrading fuel in a car engine—if the engine is too old, premium fuel won’t fix performance problems.
Conclusion
Installing Windows 11 is not complicated, but it requires preparation and awareness. Most problems happen because users skip compatibility checks or rush into installation without a plan. If you follow the correct steps—backup data, verify system requirements, create proper installation media, and configure BIOS—you can install Windows 11 smoothly without errors.
Taking time to prepare ensures a stable, fast, and secure system after installation.
FAQs
1. Can I install Windows 11 without TPM 2.0?
Yes, but it is not officially supported and may cause update and stability issues.
2. How long does Windows 11 installation take?
Usually between 10 to 45 minutes depending on your storage speed.
3. Will I lose my files during installation?
Only if you choose a clean install. Upgrade mode keeps your files intact.
4. What is the safest way to install Windows 11?
Using official Windows Update or Microsoft Media Creation Tool is the safest method.
5. Why does Windows 11 installation fail?
Common reasons include incompatible hardware, disabled TPM, corrupt ISO files, or incorrect BIOS settings.
Follow us on Facebook
Read more content: Install Windows 11
